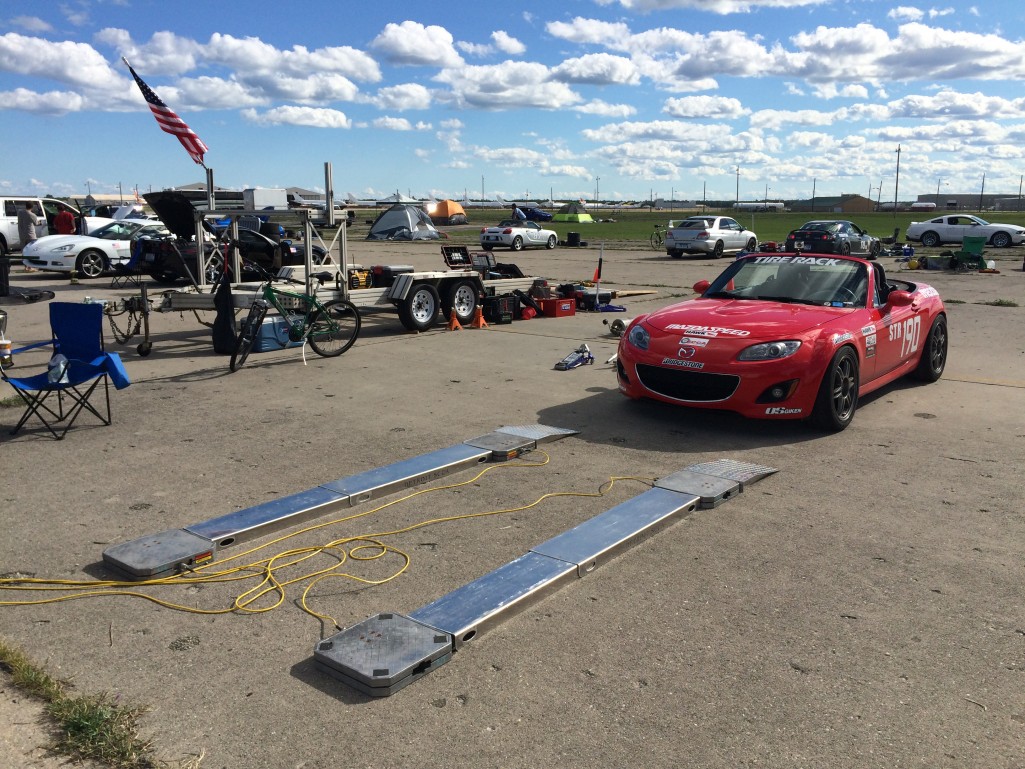
Tuning the car at Oscoda
With Nationals just three weeks away, the question now was whether or not I continued down the same path with my stiff setup, or if I should experiment with another drastic setup change (the go-softer-still setup favored by James and Shane) and hope for the best. The weekend after the Wilmington Champ Tour was another autocross test and tune and event at Oscoda, held by the Detroit Region.
I decided to keep my options open. That meant signing up for the super exclusive Thursday test and tune day in addition to the regular Friday test and tune day, taking some vacation days in order to make it work, and bringing every single pair of springs and every sway bar that I owned with me in my tire trailer.

Because I arrived quite late on Thursday, I didn’t get to testing all of the things that I had wanted to test. Thursday ended being a day where I got myself acquainted with the test course and hung out with other folks. Any changes made were minor shock adjustments in an attempt to perfect the shocks for my 700/450 spring setup.
I was on site bright and early on Friday, and immediately set to work setting a baseline for my car while the test course was empty. The car seemed to handle pretty well, with the front perhaps not gripping like I wanted it to, but it was controllable and predictable, while the rear end was well behaved, making it easy to slide and hold the slide with a little bit of throttle.
I had some friends whom I respect drive my car and ride along with me. One said friend was Kenneth Tsang, a methodical man who fabs, sets up, tests, and tunes as if he has a Standard Operating Procedure manual permanently installed in his head. He thought the car was pretty damn great. Why would you change a thing?
Hmm, good question. What I had wanted to do was try and give James’ setup a shot. My car already had 450 in/lb springs on the back. All I’d have to do is throw the 400 lb/in springs on the front and fiddle with the sway bars and I’ve something close to what James has on his car, the car that Shane repeatedly claims is the best set-up NC STR Miata that he’s ever driven.
All that throwing soft springs on the front axle would do is make the car wildly loose, Ken pointed out. Makes sense. Therefore, he suggested that I just keep the setup as-is and drive it for Nationals.
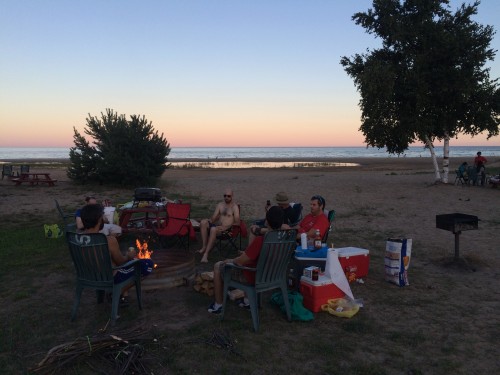
I agreed. The setup was cast in stone, for better or worse. I corner weighted the car, and that was it. I spent the rest of my time at the test and tune hanging out with friends, eating, and drinking.
Then, it was time for the autocross portion of the weekend. It was extremely frustrating, as I couldn’t extract the speed I thought I could get out of the car for either Saturday or Sunday. I couldn’t put my finger on why I was having such trouble with the car.
It all came to a head on my last run of the weekend. I was barely able to hang my head above water in STR, which isn’t a very strong class locally. I dialed things back and barely eked out a win in STR, but finishing pretty far down the ranks of the local Pro class. What now? If I had this much trouble dispatching the local STR competition, how did I stand a chance in hell against the best STR competition in the nation when I came time to compete in Lincoln?
Preparing for Nationals
A week before I was set to depart, I thrashed on the car to get all my ducks in a row.
The first things that needed attention were the exhaust and the body. At the Oscoda test and tune, the starter handed me a chunk of honeycomb that flew out of my exhaust when I launched. Back in my garage, I removed the midpipe to find half of the honeycomb missing. Hmm, I guess when the check engine light comes on, I should do some investigation into why instead of reading the code, going “oh, it’s only an O2 sensor,” and then promptly ignoring the check engine light for some three-odd months.

I had a new midpipe shipped in from Goodwin Racing, and swapped the thing into the Miata by myself in my garage. It was a miserable experience; I typically farm out this kind of under-the-car work to someone else who has a lift, but it was crunch time and I wanted to inspect the exhaust myself, even if it meant spending an hour or two on my back underneath the damn thing as it was propped up on jack stands.
The kicker was that I replaced the midpipe and the post-cat O2 sensor, which should have solved all my problems, but it didn’t. The car still had a check engine light that would reappear as soon as I reset it, and more worryingly, the car still had a minor stumble at idle. Well, if the car ran well enough for three months with whatever is ailing it right now, hopefully it will last at least another two weeks…
In what is now a yearly tradition, I also took to replacing the front wheelwell liners with new pieces, and zip-tying the whole shebang together. I also went ahead and replaced the rocker mouldings, which had been beaten for years by my sliding sideways into cones to the point where most of the clips had plain broken off.
The rocker mouldings I bought were silver ones shipped in from a junkyard. My car is red. I could just put the silver side sills on the car and have them sit there against the red, or I could do something to hide the fact that my car is now a multi-colored car. I chose the latter option.
I had always wanted to do some sort of livery on my car, and I figured that this was as good a time as any to do it. I masked out a stripe pattern in painters tape that would hide the fact that the side sills were silver, and paint the strip in metallic silver Plastidip. I figured that it would be easier than vinyl while being just as reversible.

Well, I got the “reversible” part of the equation right. Putting the Plastidip on the car was a major pain in the ass. The problem with doing Plastidip stripes is that, if you want a sharp edge on your Plastidip feature, you have to really lay it on thick and then immediately remove the edge mask before the Plastidip has a chance to dry. That means spraying one panel at a time to get the right coverage in order to pull the tape for the edge lines, and a lot of fiddling about to get the edges right.
I sprayed two cans of Plastidip in futility. I ended up doing three attempts on the hood before I finally got something that I deemed good enough, and even then, there were still plenty of flaws on the hood if you looked close enough.
The stripes on the sides of the car turned out better. I had a better inkling of exactly what the hell I was doing by then.
Even so, the durability of my Plastidip stripes was suspect. It seemed awfully easy to pick at and lift the edges of the Plastidip. So I made a run to the auto parts store and bought some cheap rolls of 1/8″ pinstriping tape, and carefully covered all the exposed edges of the Plastidip stripe with black pinstriping. Not only did the pinstripe edges help protect the Plastidip stripe, it also added some definition and contrast to the stripe, making the whole thing look a little bit better.
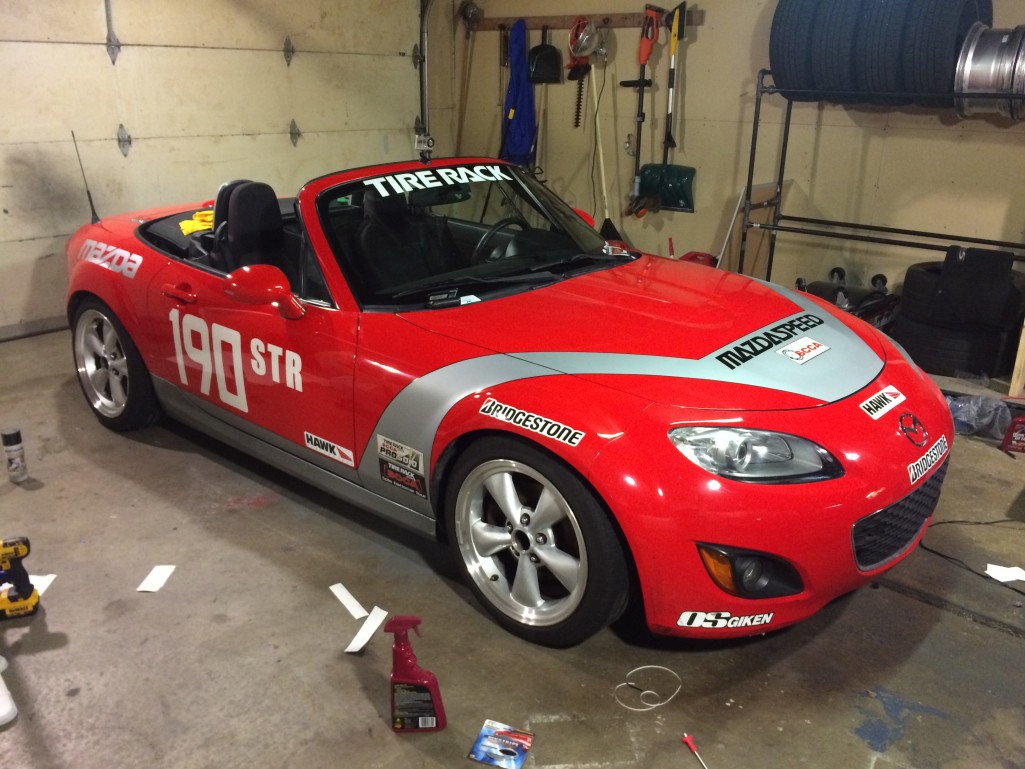
I posted a picture of the car on Facebook and the reactions were a bit mixed. Plenty of people thought it was cool, but in a matter of hours, the car’s livery had garnered some interesting nicknames — the “pantyline stripe” and “the thong” were two such examples that immediately pop into mind.
For those who are thinking of using Plastidip for stripes, my recommendation is to simply use vinyl instead. Especially if it’s a livery that occupies only a small space on the car, you’re better off just cutting vinyl pieces and sticking it on the car; by the time you’ve masked the car (and Plastidip overspray is a supremely annoying thing that will force you to mask off more than you think you need to, unless your idea of a fun time is rubbing off the light overspray that will get on everything), sprayed on the Plastidip, removed all the masking, and done whatever is needed to make the Plastidip somewhat durable (like protecting the edges of your features with pinstriping tape), you could have done your car in vinyl and be a couple of drinks into a nice, relaxing evening.
Also, be forewarned that if the texture of your Plastidip is a tad rough, it will be difficult to stick and keep vinyl decals on top of the Plastidip. I had a hard time keeping the decals on the hood from lifting, mostly because that was where my Plastidip coat didn’t have the best texture.
I loaded up the car and the tire trailer and left home early in the morning on Friday. I blitzed my way across the Midwest to arrive in Lincoln in the early evening, just in time to get registered and get some course walks in before the madness of the Pro Finale started.